Install Multi-Fixed Handles – Single Sided
These instructions are suited to any handle with multiple fixing points such as
- Square & rectangular handles
- Larger half moon handles
Fittings
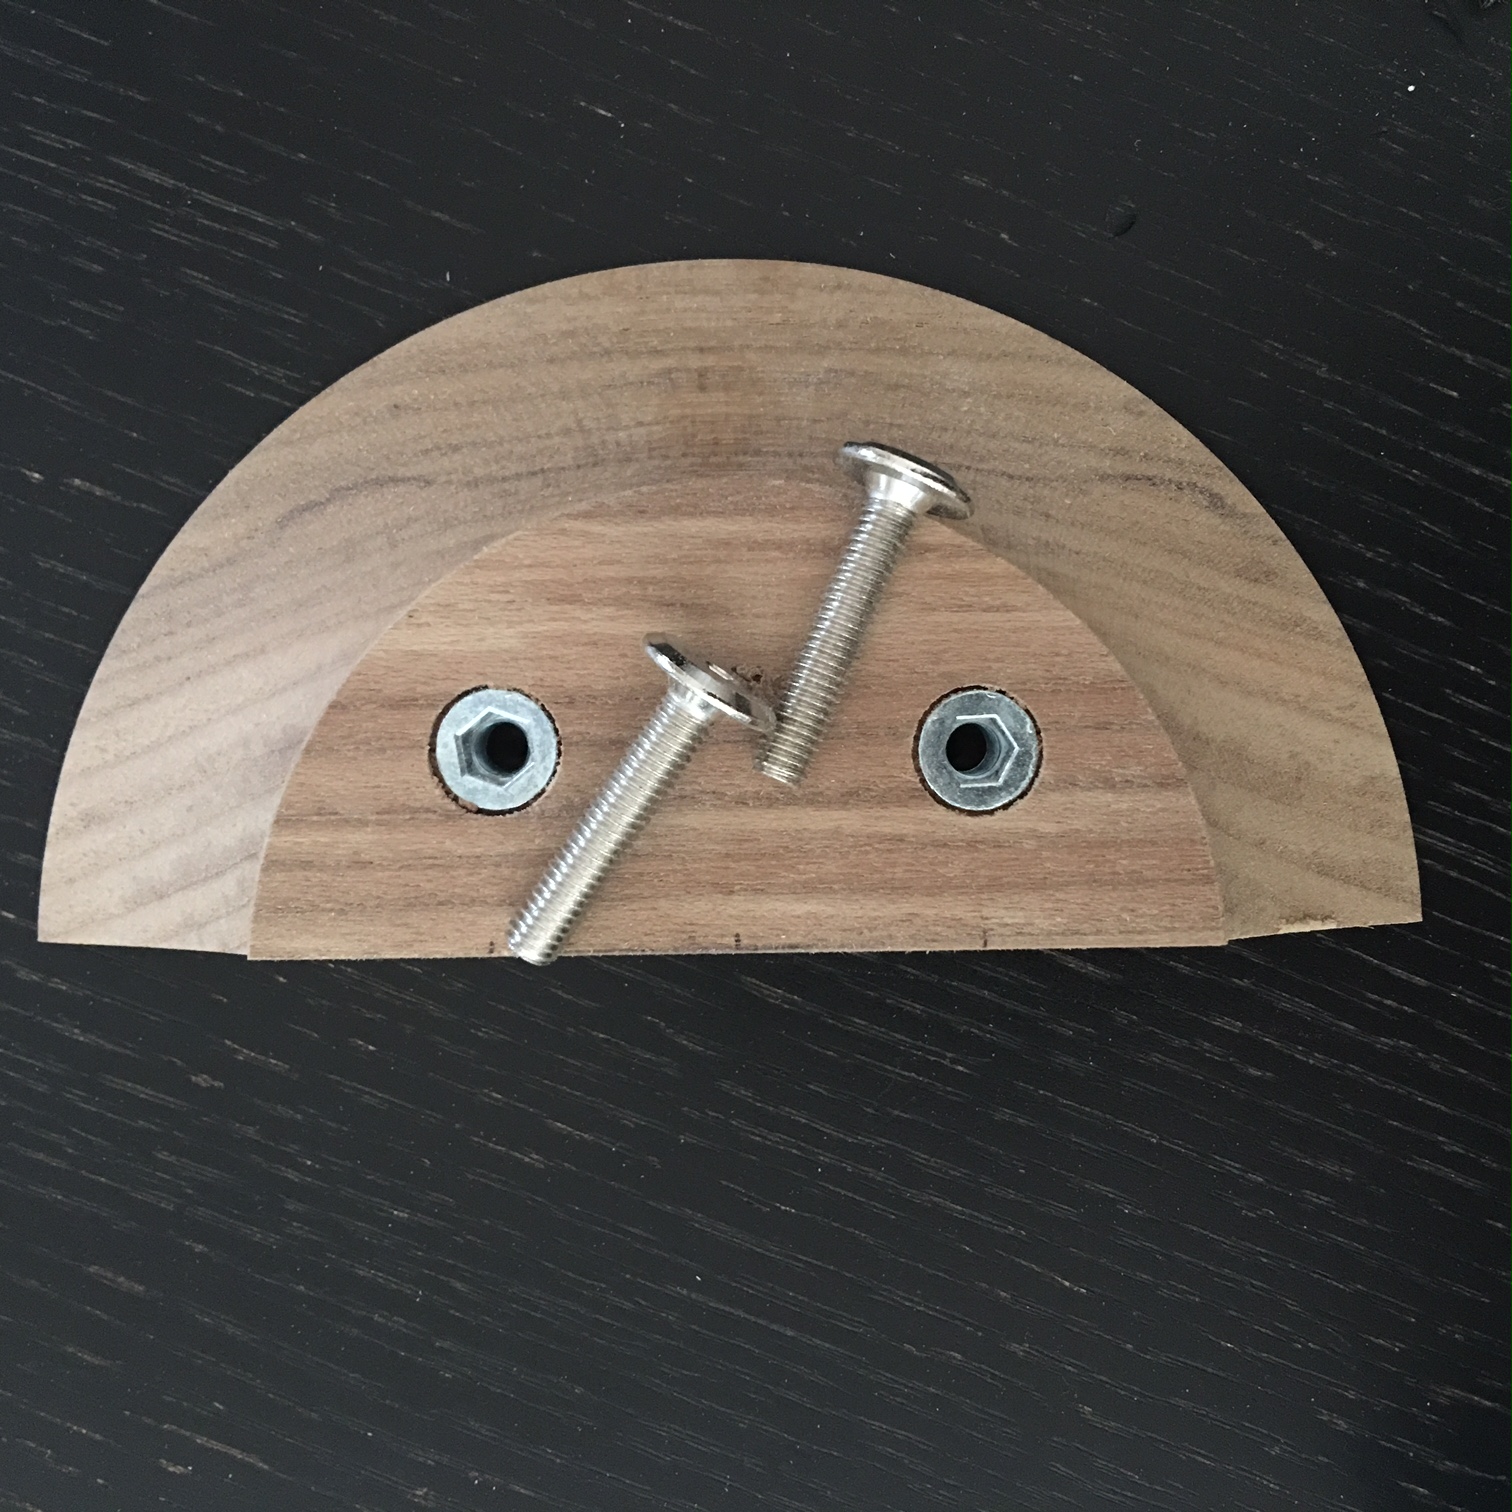
Joinery & door handles are supplied with all fittings required for fixing the handles to the door. Included are:
- Metal threaded inserts prefixed in rear of the handle
- 2 (or more if needed) Screws for fitting into each insert
Safety
- Always follow the manufacturer’s safety instructions when using power tools and adhesives
- Wear safety glasses throughout the installation
Step 1: Set up
You will need
- 8mm drill bit (depending upon the size of the fitting)
- Allen key
- Safety glasses
- Handle and fittings
Step 2: Prepare the door
a) Measure the distance between each of the fittings. This is taken from the centre of the top fitting to the centre of the bottom fitting.
b) Locate and mark the top (left if fixing horizontally) position for the handles on the door.
c) Mark the position for the bottom fitting (right if fixing horizontally) according to the measurement taken in a).
d) Drill 8mm holes through door at the points marked out above
Step 3: Install
a) Holding the handle at the marked position on the front of the door.
b) Pass the top (or left) screw through the predrilled door hole from the rear. Ensure it is properly aligned with the threaded insert. Wind into the threaded insert at the top (or left) of the handle. Tighten without over tightening.
c) Repeat the same with the bottom (or right) screw.
d) Go back & tighten the screws firmly with the Allen key, beginning with the top fitting.
All Done!